Home
/ How To Install A Plank Wall - Start laying the flooring along one wall, working row by row.
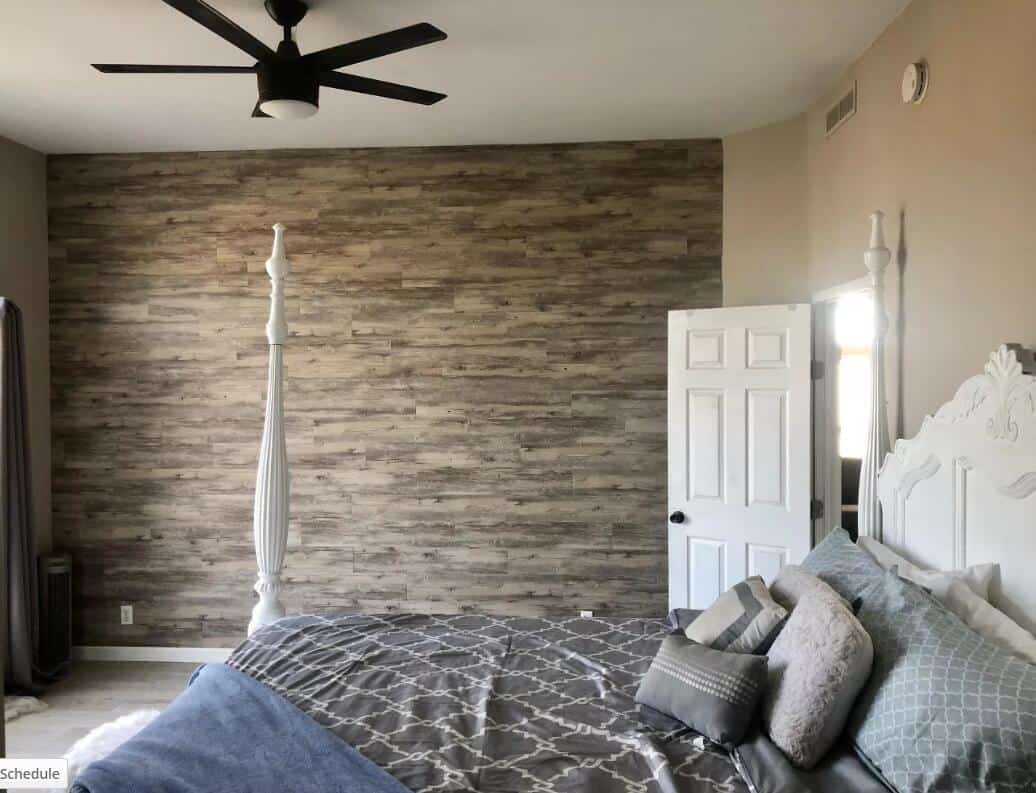
How To Install A Plank Wall - Start laying the flooring along one wall, working row by row.
How To Install A Plank Wall - Start laying the flooring along one wall, working row by row.. The planked wall i'm sharing today has a slightly different vibe then you get with the smooth boards or planks and very tight joints like the shiplap style lots of folks are using. Learn how to install a wood plank wall with roommates peel and stick wood wall planks. This was also a great way to weed out any cracked or warped sections of board. The plank wall was a pretty easy project, but a little mishap on my part made it take twice the time it should have. If you placed positioning nails in the wall in step 4, remove them now.
Each box of weathered wall boards covers 10.5 square feet. Gripsure vinyl plank flooring has adhesive strips to connect the planks together. This was also a great way to weed out any cracked or warped sections of board. This is the line you'll install your first row along. Whether you want to finish your wall with trim or keep a raw edge.
How To Install Wood Plank Walls Beneath My Heart from www.beneathmyheart.net Learn how to install wood planks around a corner. Grab a plank, measure it to the space on the wall, mark, cut, and install. These edges will not be painted further, but the primer will keep you from seeing the wood between the planks on your finished wall. Benefits of using laminate flooring on walls. Then use a roller for the rest. The board acts as a barrier between the planks and the wall. Here's a quick peek at the room before the before…. Take the total width of the walls and divide that number by the width of a single plank.
Gripsure vinyl plank flooring has adhesive strips to connect the planks together.
Lay the first plank, appropriately spaced from the wall. The width of one wall is 20 inches and the width of the second wall is 30 inches making the total width 50 inches. Attach the plank to the wall making sure it aligns with the starting line you established earlier. Using your level, draw a line at the height of your mark down the full length of your wall. This will give you an idea of how many planks you will need to use for this project. Take the total width of the walls and divide that number by the width of a single plank. Whether you want to finish your wall with trim or keep a raw edge. Allow 6 to 8 hours for the adhesive to fully cure. I laid several planks on their sides to apply the primer. Begin from either side and stick the plank to the wall making sure to line up the sides and bottom of the plank to the side and bottom of the wall. Press the panel firmly against the wall. Press firmly on the blank holding it in place for 5 to 10 seconds. Using a nail gun, secure 1/4 plywood to the wall at the studs, extending to the ceiling.
Planking walls is nothing new to the diy world. This was also a great way to weed out any cracked or warped sections of board. I used a miter saw to make my cuts. Learn how to install a wood plank wall with roommates peel and stick wood wall planks. Grab a plank, measure it to the space on the wall, mark, cut, and install.
18 Steps To Install Vinyl Plank Flooring On Wall from www.whatisvinyl.com Here's a quick peek at the room before the before…. Installation of wallplanks is much easier if you have a second person to help, particularly in the process of establishing a completely level starting line (first row of planks you install). Begin from either side and stick the plank to the wall making sure to line up the sides and bottom of the plank to the side and bottom of the wall. How to plank a wall. I used a miter saw to make my cuts. Place the wood panel back on the wall and place a level on it to make sure the panel is level. Continue in this manner for the remainder of the row, trimming the last plank as needed. In the below pic you can see the wet paint over the primer.
Place the wood panel back on the wall and place a level on it to make sure the panel is level.
Lay the first plank, appropriately spaced from the wall. Use a stud finder or knock or drill holes until you find the studs at the top and bottom of the portion of wall you are going to install your planks on. Lower the second plank to snap the planks together. Measure the square footage of your wall by multiplying the height of the wall by the width. Installation of wallplanks is much easier if you have a second person to help, particularly in the process of establishing a completely level starting line (first row of planks you install). Place the wood panel back on the wall and place a level on it to make sure the panel is level. Allow 6 to 8 hours for the adhesive to fully cure. Avoid visible nail holes install planks with the tongue up. Attach the plank to the wall making sure it aligns with the starting line you established earlier. Whether you want to finish your wall with trim or keep a raw edge. Below is a list of the other benefits of using laminate flooring: You are applying the planks on two walls. In fact there are a bunch of great tutorials out there on how to do it with a million different materials, techniques, and results.
The board acts as a barrier between the planks and the wall. Begin from either side and stick the plank to the wall making sure to line up the sides and bottom of the plank to the side and bottom of the wall. The width of one wall is 20 inches and the width of the second wall is 30 inches making the total width 50 inches. Gripsure vinyl plank flooring has adhesive strips to connect the planks together. Place books/bricks atop the 2x 2s while the glue dries.
The Easiest Way To Diy Wood Plank Ship Lap Accent Wall With Vinyl Flooring from cdn.shopify.com Use a jigsaw to cut a hole in the plywood base for outlets. Using a nail gun, secure 1/4 plywood to the wall at the studs, extending to the ceiling. Dry fit the second piece of paneling by placing the groove inside the tongue of the first panel. Benefits of using laminate flooring on walls. Lay the first plank, appropriately spaced from the wall. Continue in this manner for the remainder of the row, trimming the last plank as needed. Measure the square footage of your wall by multiplying the height of the wall by the width. Once you get the planks on the wall any visible adhesive will wipe right off.
Photo courtesy of lesley clavijo/chaotically creative.
Here's a quick peek at the room before the before…. It can be installed anywhere, in high moisture areas use vinyl plank. Use a stud finder or knock or drill holes until you find the studs at the top and bottom of the portion of wall you are going to install your planks on. Use the left over piece from the same plank to start the next row. The best way to paint tongue and groove is to use a brush to paint inside the cracks first. Plank and mill shows you how to properly. Once you get the planks on the wall any visible adhesive will wipe right off. Hopefully you can learn from my mistakes because it should have taken me only 1 day to install. Hopefully you get a better idea of the process from my photo above. Learn how to install wood planks around a corner. Apply construction adhesive on the side of the plank designed to attach to the wall. Avoid visible nail holes install planks with the tongue up. The board acts as a barrier between the planks and the wall.

